 Hyundai Equus: Roof Trim Assembly Repair procedures
Second generation VI (2009–2025) / Hyundai Equus VI 2009-2025 Service Manual / Body (Interior and Exterior) / Roof Trim / Roof Trim Assembly Repair procedures
| Replacement |
|
|
| 1. |
Remove the front seat.
(Refer to Front Seat - "Front Seat Assembly") |
| 2. |
Remove the rear seat.
(Refer to Rear Seat - "Rear Seat Assembly") |
| 3. |
Remove the front pillar trim.
(Refer to Interior Trim - "Front Pillar Trim") |
| 4. |
Remove the canter pillar upper trim.
(Refer to Interior Trim - "Center Pillar Trim") |
| 5. |
Remove the rear pillar trim.
(Refer to Interior Trim - "Rear Pillar Trim") |
| 6. |
Remove the sub sunvisor.
(Refer to Roof Trim - "Sunvisor") |
| 7. |
Remove the sunvisor and retainer.
(Refer to Roof Trim - "Sunvisor") |
| 8. |
Remove the assist handle.
(Refer to Roof Trim - "Assist Handle") |
| 9. |
Remove the overhead console lamp.
(Refer to Body Electrical System - "Overhead Console Lamp") |
| 10. |
Remove the room lamp.
(Refer to Body Electrical System - "Room Lamp") |
| 11. |
Remove the rear window glass.
(Refer to "Rear Window Glass") |
| 12. |
Remove the hands free mic.
(Refer to Body Electrical System - "Hands Free Mic") |
| 13. |
Using a screwdriver or remover, remove the inside rear view mirror cover (A).
|
| 14. |
Disconnect the inside rear view mirror connector (A), auto
defog sensor connector (B), lane departure warning system (LDWS)
connector (C), rain sensor connector (D).
|
| 15. |
Remove the handsfree mike (A) and lamp (B) by pushing down the hook using a screwdriver.
|
| 16. |
Disconnect the roof trim main connectors (A) and the mounting clips in the front pillar.
[Driver's]
[Passenger's]
|
| 17. |
Disconnect the connectors (A) and the mounting clips in the rear pillar.
[LH]
[RH]
|
| 18. |
Using a clip remover, detach the roof trim assembly mounting clips. |
| 19. |
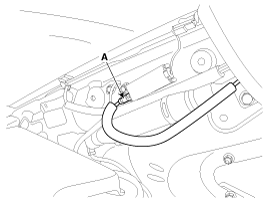
Pull back the roof trim assembly (A) through the place where the rear window glass was removed.
[Sadan]
[Limousine]
|
| 20. |
Remove roof trim wiring harness (A) from the roof trim (B).
|
| 21. |
Install in the reverse order of removal.
|
 Roof Trim Assembly Components and Components Location
Component Location
1. Roof Trim Assembly
...
 Interior Trim
...
See also:
Troubleshooting
Troubleshooting
1.
Items to inspect if the AVN Head Unit, Front Monitor, or Rear Monitor fails.
SymptomPossible causesDefects and checkpointsNotesFaulty Monitor screen
1.
Faulty connecti ...
Positive Crankcase Ventilation (PCV) Valve Description and Operation
Operation Principle
...
6 Speed Clutch Control Solenoid Valve Description and Operation
Description
6 Clutch control solenoid valve is attached to the valve
body. This variable force solenoid valve directly controls the hydraulic
pressure inside the 6 Clutch. ...
Categories
Hyundai Equus Manuals
© 2011-2025 Copyright www.heqmanual.com


